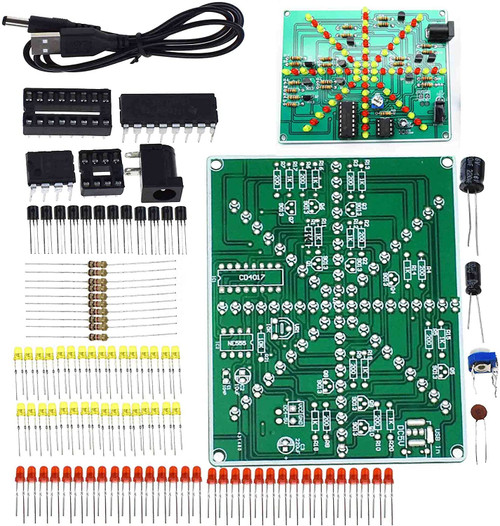
Installation Tips:
1>.User needs to prepare the welding tool at first.
2>.Please be patient until the installation is complete.
3>.The package is DIY kit.It need finish install by user.
4>.The soldering iron can't touch the components for a long time(1.0 second), otherwise it will damage the components.
5>.Pay attention to the positive and negative of the components.
6>.Strictly prohibit short circuit.
7>.This DIY installation is more difficult to be installed, please be patient until the installation is complete!!!
8>.User must install the LED according to the specified rules.Otherwise some LED will not light.
Installation Steps(Please be patient install!!!):
1>.Step 1: Install 3pcs Copper pillars and M3 Screw on Acrylic Welding Template.
2>.Step 2: Process 24pcs LED(Not all LED!!!).Curved LEDs shorter pin(negative pole) and form a right angle.Please be careful not to damage the LED.
3>.Step 3: Install the LED ring.Put the already processed LED on acrylic template.Longer pin(Positive pole) outward. Shorter pin(Negative pole) interconnection.
4>.Step 4: Use a soldering iron to fix LED the negative pole(Shorter pin).The soldering iron cannot touch the LED pins for a long time, otherwise it will damage the LED.
5>.Step 5: Cut off excess pins.Just cut shorter pin!!!
6>.Step 6: Install others 2pcs LED rings as the same method.
7>.Step 7: Install 1pcs MINI USB Female Socket at J1.
8>.Step 8: Install 1pcs Toggle Switch at S1.
LED Flashing Tree DIY Kits Electronics Kits DIY Solder Kit Soldering Practice Learning PCB Board Star Flashing LED Lamp Soldering Kit with Blue Dream Light Circle
Was:
$61.88
Now:
$30.94
- SKU:
- YTH308529
- UPC:
- 779605693138
- Condition:
- New
- Availability:
- Free Shipping from the USA. Estimated 2-4 days delivery.


